


We have had lots of requests for a tutorial on how to make a lanyard. This is NOT an ITH project. You will need a regular sewing machine for this one. You'll also need a ruler, rotary cutter (helpful but not required), an iron, lanyard hardware, rivets, and a way to set the rivets. Links will be at the end of the tutorial!
Step 1: Measure your lanyard hardware. You need the *inside* lanyard measurement. This one is 3/4" inside measurement. Take that number and multiply it by 4. This will be your fabric width. For this lanyard, it's 3/4 x 4 = 3 inches.

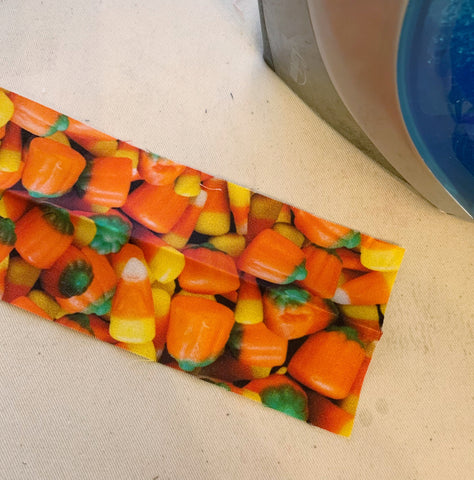
Step 2: Choose and cut your fabric. Quilt-weight cotton woven is my favorite type of fabric to use. You want something with a small enough pattern that 3/4" (or whatever the inside measurement of your lanyard hardware is) makes sense with the fabric. A scattered print rather than a directional print is easier too, unless you want to piece the lanyard in the back of the neck so that both sides will be right side up.
I like to cut a small snip on the selvage and rip a straight edge to start, then use a rotary cutter and mat to cut clean strips.
Cut your fabric into the fabric width strips across the WOF (width of fabric). Fabric is usually around 42" for quilt-weight cotton. Once you trim the selvage edge and sew the lanyard, the finished length will be around 39" not including the hardware. If you want yours to be longer, you'll have to piece the strips. I recommend doing this at the midpoint so the joint will be behind the wearer's neck. If you want your lanyard shorter, simply trim off length before you proceed with the next step.

Step 3: Pressing your fabric strips.
First, trim off the selvage edges and fold the strip in half longways. I've showed you the outside of the fabric so you can see the crease. Press the strip in half all the way down the length of the fabric. (Please excuse my hideous ironing board cover! It's 15 years old and very stained, despite being washed regularly. Why do they make these things light colored?!)
Open up the strip and fold one outside edge to the center crease. Press along this edge.

Repeat with the other outside edge.

You strip should look something like this.

Fold it in half so that the raw edges are enclosed in the strip. Give it another good press to set the creases.

Step 4: Attaching the lanyard hardware and preparing your continuous loop.
Thread your lanyard hardware onto the lanyard. Lay the strip flat so that there are no twists or turns in the fabric.

Leaving the lanyard flat on the surface, carefully unfold the fabric. Keep the right sides that were touching against each other. The first few times you do this, you may want to insert a pin into these layers before you unfold. I've added a purple arrow to the photograph to help you orient that top strip.

Take your top end of fabric and rotate it 90 degrees to the left. You are not going to pick it up and twist it. Leave it right sides touching and turn the top piece only. It should look something like this. You may want to insert a pin in the pieces to keep them together just in case!

I'm right handed, so I need to rotate the whole shebang so that I can draw my line for sewing. Overlap the edges just about 1/4" on each side. Pin in place.
Grab your ruler and connect the two points where the overlapping fabrics meet. Use a fabric marker that won't bleed through your fabric (i.e., NOT a Sharpie!). This is a pen that disappears when it is heated. Some people have reported "ghosting" of the lines when the fabric is frozen, but this line is inside my lanyard, and I am not worried about whether it will show inside later. Chalk works well especially on dark fabrics.

This is the line that you will stitch together.

Take the lanyard to your sewing machine. Stitch down the line. (The fold in the fabric makes the line look oddly angled on that last folded side, but it is a straight line!)

Trim the excess fabric, leaving 1/4" seam allowance.

Open the seam allowance and gently press it flat.

Fold your lanyard back closed, smooth it out, and make sure there aren't any twists or tangles. Give the sewn area another good press to keep everything flat for stitching.

Take your lanyard (which is now in a continuous loop with the lanyard hardware dangling freely) to your sewing machine. Using a foot with a blade on it like this one will make sewing the outside edges so much easier! One came with my machine. They're sometimes called edgestitch, stitch in the ditch, or edge joining feet.
Inspect your lanyard strip and decide which side you want to be the "right" side when it is finished. Sometimes the pattern looks better on one folded side than another. Put that better side up when you start stitching because the top side of stitching always looks better than the bobbin side even when you use matching thread. (And you should be using matching thread right now!) I like to start on the open side in the space between where the seams show on the folded edge. Set your stitch length to 3.0 - 3.5, and make sure you have a fresh needle. Stitch all the way around your lanyard, stopping just a stitch or so over where you started. The hardware should keep out of your way easily.

Now repeat the process for the other side of your lanyard.

Trim your threads and slide the hardware down to where you started/stopped. Try to hide as much of the seaming as possible with your hardware positioning. Mark a center dot about 1/2" to 3/4" above the hardware. Grab your leather punch or awl and poke a hole through both sides of the lanyard. You may want to do one at a time.

Now you have a hole for your rivet!

You'll need your rivet and cap, and your rivet setting materials. I used a kit from amazon that came with the setting pieces. If you have a tabletop snap press, there may be a rivet setting die that you can use instead. The setting tools have a concave curved side and a flat side on the disk and a concave curved end and a flat end on the setter. Use the concave sides against the curved rivet and caps.

Poke the rivet through the hole.

Snap on the cap.

I'm honestly not sure if it matters which side is up or down when you're setting the rivet. To be safe, I give it a few strikes on both sides. Whack the hammer on the flat end of the setting stick.

Your rivet should be nicely smashed together. Give it a gentle tug to make sure the cap is set.

And your lanyard is complete! Add your favorite POP charms to coordinate. This candy corn is the I Heart Candy Snaptab with the tab removed and the Eyelet Add-on added on to make it a charm (FREE with a code from the POP Facebook Group!). Let me know in the comments if you would like a blog tutorial on how to do this switcheroo in Embrilliance Essentials!
And because it was sitting still, I added a monogram. (Rivermill's Small Mini Thin Round Monogram)

Make a matching ID Keeper Zipper Case and add a tab to make custom lanyard wallets!

Let me know if you have any questions! I can't wait to see your lanyards and coordinating charms and ID Keepers. Come share them in the Parker on the Porch Facebook Group!
Parker on the Porch designs:
- I Heart Candy Snaptab
- Eyelet and Snaptab Add-On (FREE with a code from the POP Facebook Group!)
- ID Keeper Zipper Case
Supplies:
- Halloween Cotton Fabric Real Photo Candy Corn from JoAnn
- Yellow Glitter Vinyl from MyPunkbroidery
- Swivel Lobster Clasp
- 1" Spring Hook Lanyard Clips
- Ball Chains
- Leather Punch
- Rivet Kit
- 3" x 18" Ruler
- Rotary Cutter and Mat