FAQ Series: How to use HTV with Applique

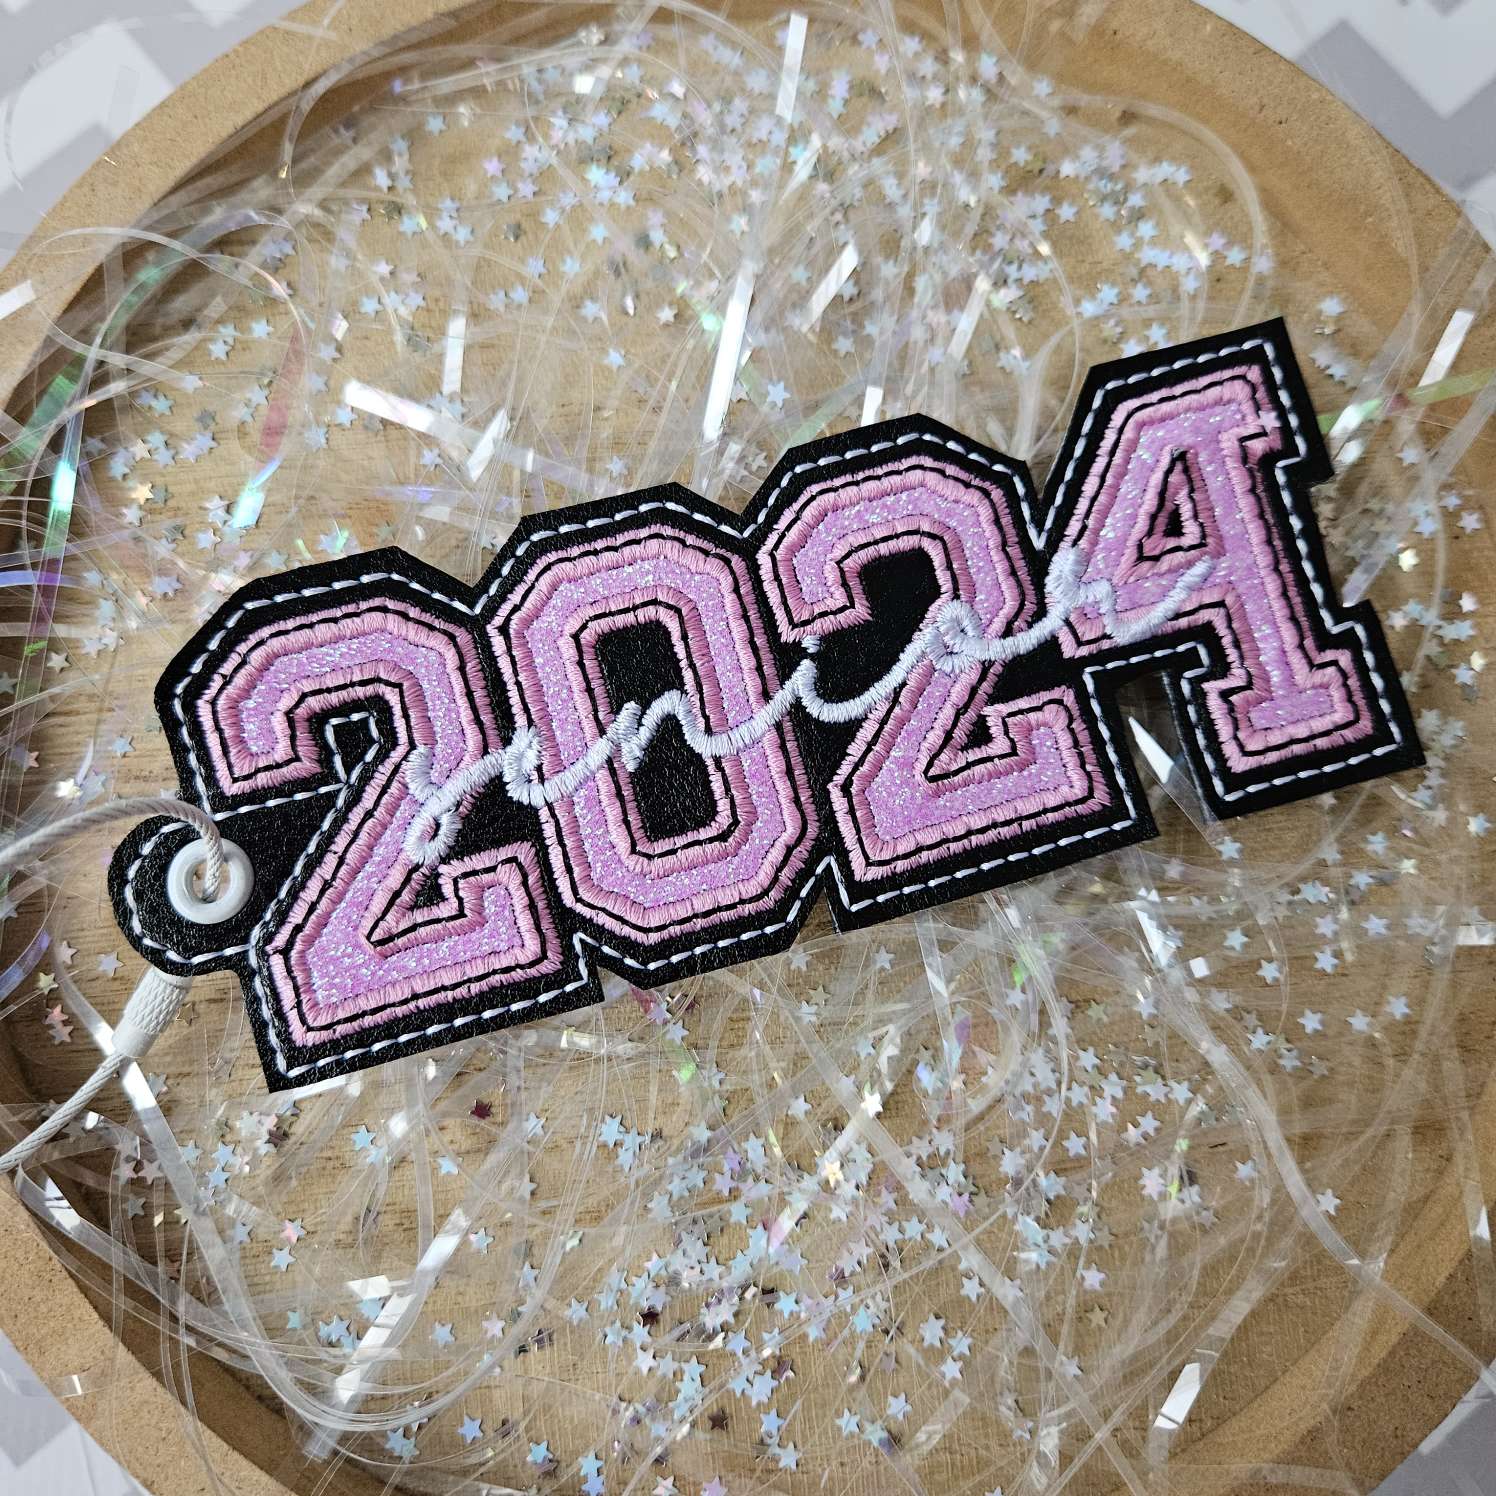
Have you seen posts about people using HTV in embroidery projects? Perhaps you’ve wondered what that’s all about and have it on your “to do” list to try. Great news! It’s EASY and the new in-the hoop POP “Senior 2024” Bag Tag design is the perfect one to give HTV a try with!
What is HTV?
Heat transfer vinyl or “HTV” for short, is not the same as the typical fuzzy-backed vinyl used in embroidery. HTV vinyl is most commonly used when ironing on vinyl designs to shirts. It comes in sheets or rolls at big box craft stores such as Joanns, Hobby Lobby, and Michaels. (It can also be ordered on Amazon.) HTV is thin and has a clear plastic piece on top called a carrier sheet that you will remove before embroidering. When picking out HTV for this project, you’ll want to be sure you choose one that specifically states “Iron-On”. In the same aisle as HTV you’ll also find “Removable” and “Permanent” Vinyl. You do NOT want either of those options for use in this embroidery project.

Helpful Tip: Glitter HTV tends to be a little easier to remove from the parts of the design outside of the applique area than solid colored HTV.
Supplies Needed
- POP! Senior 2024 Design
- Vinyl, promo vinyl used here by My Punkbroidery
- Cutaway Stabilizer (varies by design and vinyl quality) Tearaway is used with this sample.
*If you’d rather not use HTV for the applique, you can still easily make this POP freebie design! If opting not to use HTV, you can simply run the design without any HTV, or you can use fabric with Heat and Bond Lite applied to the back. You would then have to trim around the numbers with scissors before running the satin stitch (Step 4)*
Time to get stitching!
- Hoop one sheet of tear-away stabilizer. If your vinyl is especially thin, you might want to use two sheets of tear-away stabilizer.
- Run Step 1, the placement stitch. This will show you where to place your vinyl.

- Lay your vinyl on top of your hoop covering the placement stitches. Be sure you have about an inch around the perimeter of the design outline so you have plenty of space for trimming later! (I cut my vinyl to 3in. X 6.5in. for this tutorial.) Secure your vinyl with tape.

- Run Step 2. This will stitch the placement lines for “2024” onto your vinyl.
- Cut a piece of HTV large enough to cover the numbers 2024 of the design. (I cut my HTV to 5.5in x 2.5in.)
- At the corner of the HTV, use your fingernail to separate the HTV from the clear plastic film on top of the HTV. Carefully, completely remove the clear plastic film.

- Place the HTV over the number 2024 of the design and secure it with a couple of pieces of tape on the perimeter. The HTV will feel thin without the plastic film-don’t worry! :-)

- Run Step 3. This will tack down the HTV.

- Remove the hoop from the machine and carefully remove the HTV from the outside of the numbers and from inside of the holes of the “0” and “4” by gently tearing away the excess with your fingers. This is where it comes in handy to be using HTV instead of having to trim fabric with your scissors! Use a seam ripper or tweezers to help get the HTV vinyl started peeling away in the tight spaces between the numbers. Just be sure not to accidentally cut the embroidery vinyl underneath! Don’t worry if it doesn’t tear perfectly. You can clean it up a little better with your scissors if necessary but the design has a nice wide satin stitch!

- Run Steps 4-6. This will run the satin stitch of the numbers (Step 4), a bean stitch in the middle of each number’s satin stitching (step 5), and the word “senior” (step 6).

- BEFORE running step 7, turn your hoop over and cover the BACK of the design with vinyl right side UP (facing you), and secure it with tape on the perimeter.

- *Helpful Tip: Tape an extra piece of tear-away stabilizer over the vinyl on the back of the hoop. This will help prevent the vinyl from sticking to the bed of your machine.*

- Run the final step to attach the vinyl on the back of your design to the front.
- Remove from the hoop, tear away the excess stabilizer, and trim around the perimeter of your new bag tag.
- Finish up by punching a hole and setting an eyelet with a tool such as the “We R Memory Keepers Crop-A-Dile for Eyelets.
- Attach the bag tag to a beaded chain or steel cable ring and you’re done!


