


DIY Shabby Stuffie Stand
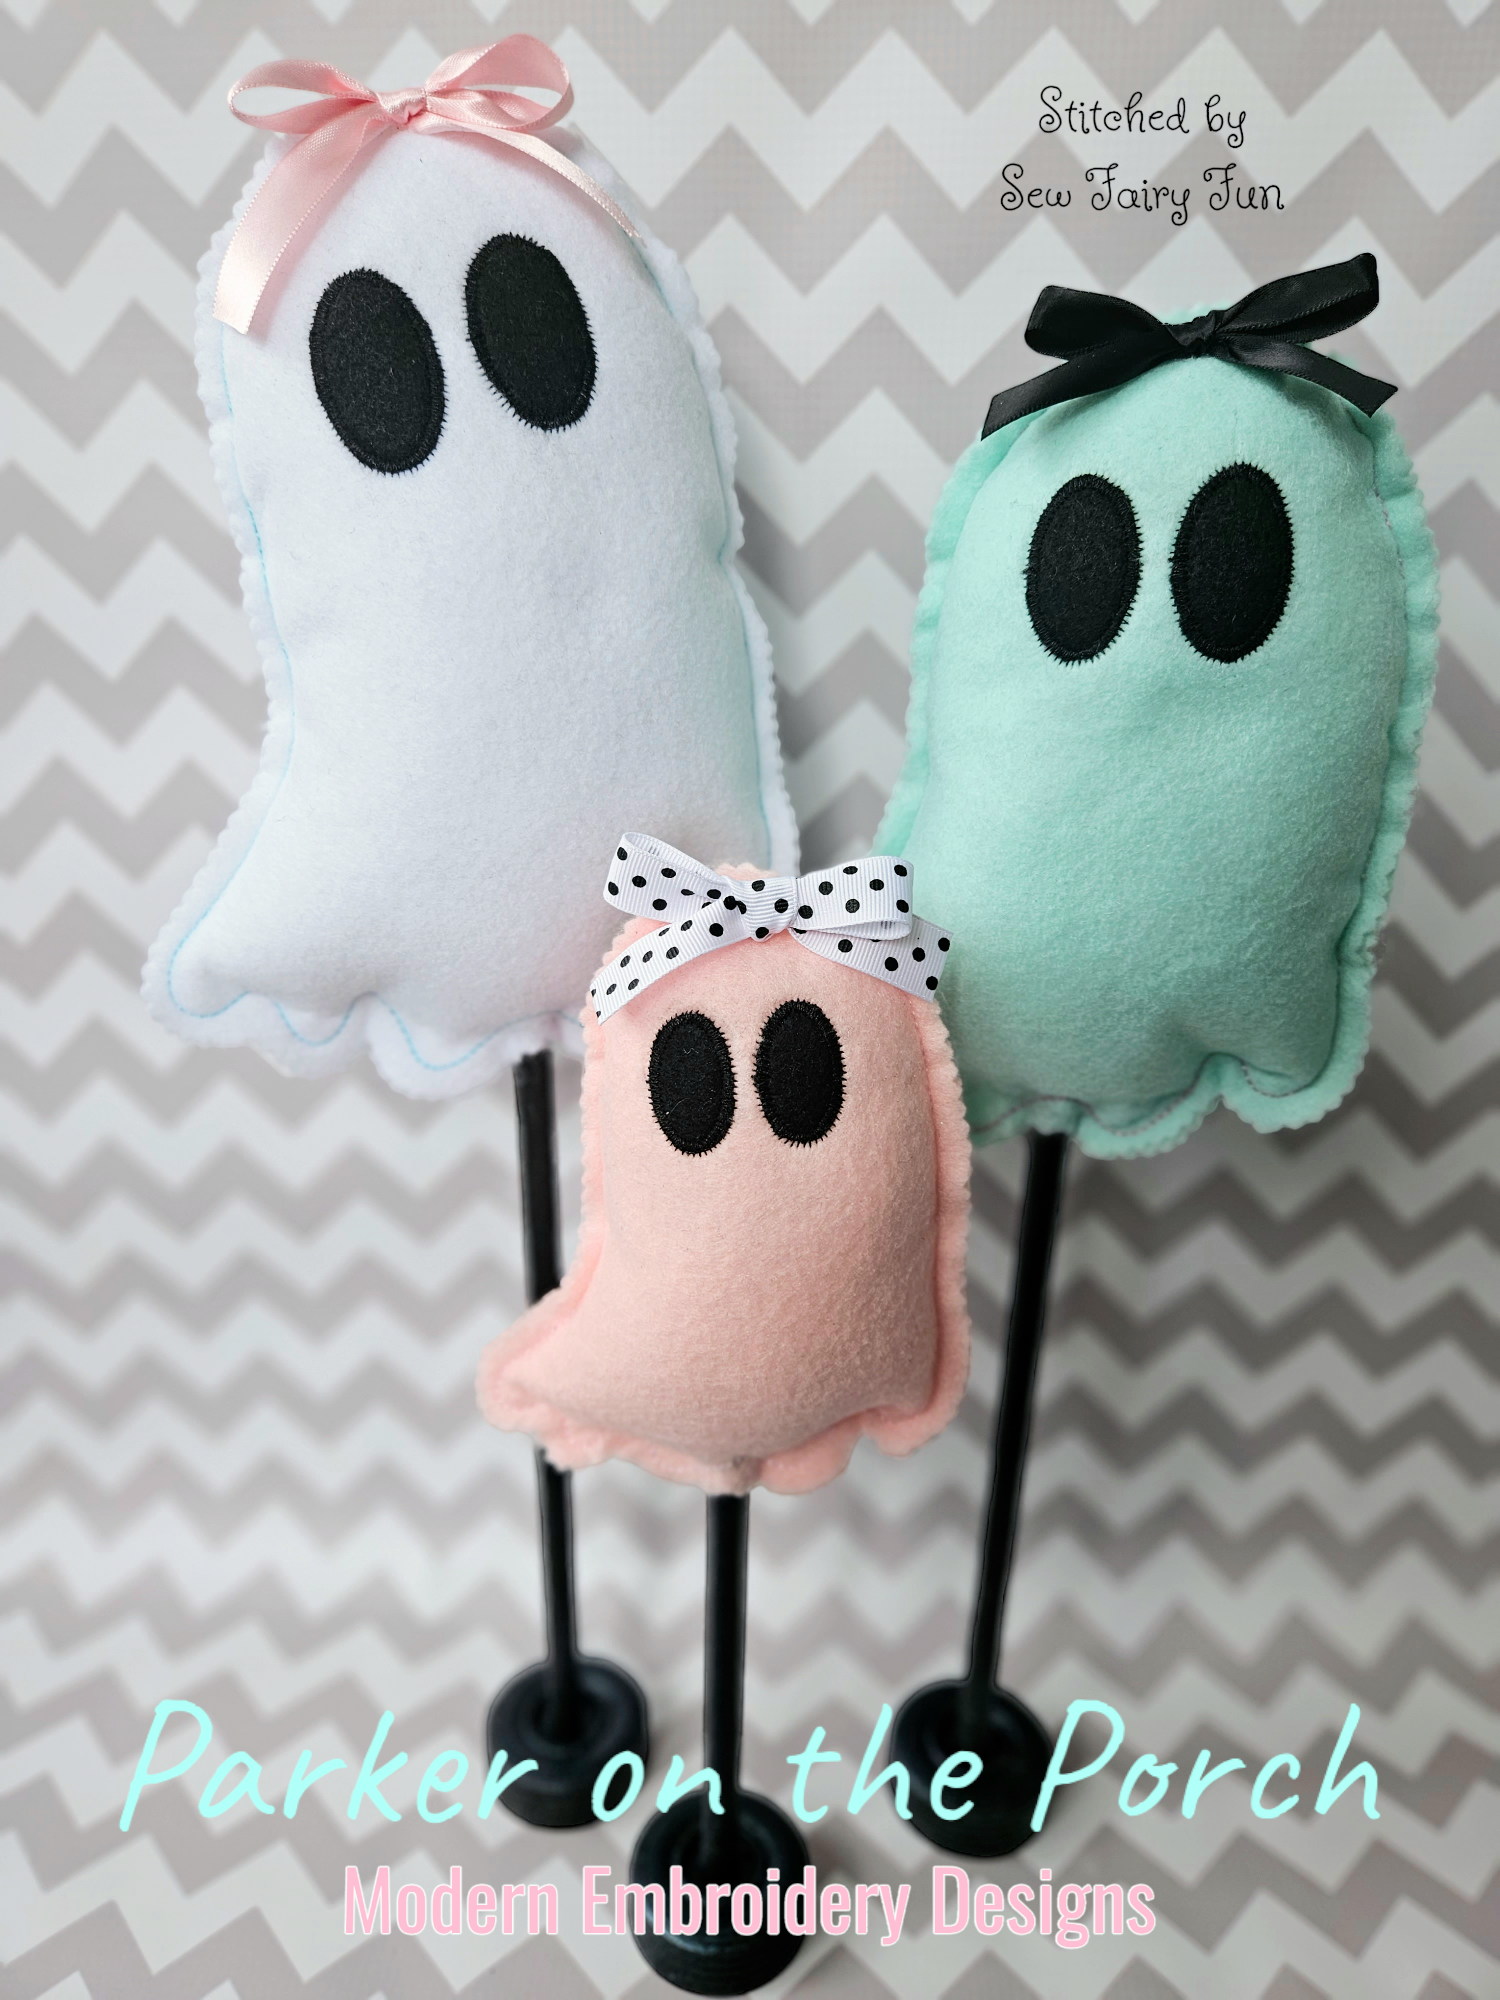
Did you see this week’s new Parker on the Porch shabby ghost stuffie design? Cuteness overload!! Follow the tutorial below to learn how to make a quick, inexpensive stand to display the shabby ghost stuffie or any of the other shabby stuffie designs Jen has created!
Supplies Needed
-
3/8 inch diameter wooden dowel rod. These are available on Amazon in multiple lengths. I chose to buy one 36 inch long rod for $1 from Hobby Lobby and cut it into 3 different lengths using a hand saw.
-
Small hand saw (Depending on if you need to saw your dowel into shorter lengths.)
-
Paint or spray paint (optional)
-
Hot glue gun and hot glue


Instructions
-
Stitch out your shabby stuffie design following the Parker on the Porch PDF tutorial.
-
If you bought a long dowel and need to trim it down to a smaller length, cut it down to your desired length(s) with a hand saw. Below are the lengths I used for the three shabby ghost stuffies I made for the tutorial in case you were wondering!

-
7x11 stuffie- 14 inch long dowel
-
6x10 stuffie- 12 inch long dowel
-
5x7 stuffie- 10 inch long dowel

-
If you would like to paint your wooden dowel and wheel, now is the time to do it! I have previously painted the dowels and wheels with regular acrylic paint and a paintbrush and it works great but it is pretty time consuming. I used spray paint this time and it was SO much easier and faster.
-
I inserted my dowel into the hole of the wheel before painting. Don’t push the dowel too far into the wheel hole or it won’t stand up. You want the bottom of the wheel completely flat so your stuffie doesn’t fall over (see picture).


-
Once your paint is completely dry, it’s time to grab your shabby stuffie! First, stuff it to your liking.
-
Use your finger to make a hole in the stuffing as close to the middle of the inside of the stuffie as possible where the wooden dowel will be placed.

-
Next, add hot glue following the stitch line on the inside of the stuffie.
If you find this to be difficult, you may have overstuffed your stuffie a bit. Try taking a little stuffing out and then try again.

-
Insert the end of the wooden dowel into the hole you made with your finger during step five until the dowel is about halfway into the stuffie.

-
Pinch and hold the bottom of the front piece of the stuffie to the bottom of the back piece of the stuffie around the dowel. Be careful not to burn your fingers if your glue gun gets really hot!

-
Add additional embellishments such as ribbon, bows, etc with hot glue. Get creative and have fun!
-
Put your new stuffies on display and be ready for lots of compliments!
