

Let’s Make a Pencil Topper
It is hard to believe how quickly the new school year is approaching. What’s better than brand new freshly sharpened pencils? Those same pencils…with adorable Parker on the Porch pencil toppers!
Supplies Needed
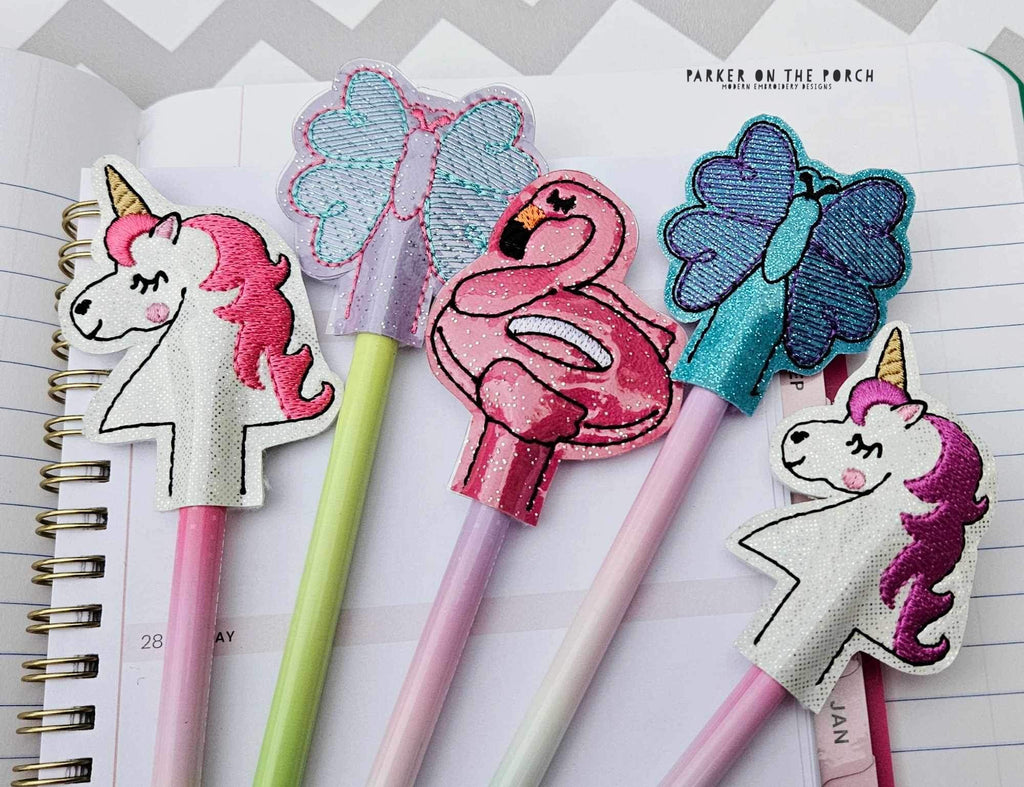
- POP! Pencil Topper Design we are using the Unicorn
- Felt or vinyl- Either works great!
Time to get stitching!
Hoop one sheet of tear-away stabilizer. If your vinyl or felt is especially thin, you might want to use two sheets of tear-away stabilizer.
Run Step 1, the placement stitch. This will show you where to place your felt or vinyl. Vinyl was used for this tutorial.

Lay your vinyl or felt on top of your hoop covering the placement stitches. Be sure you have about an inch around the perimeter of the design outline so you have plenty of space for trimming later! Secure your vinyl with tape.

Run the design element steps of the pencil topper of your choice. For the unicorn pencil topper, this is steps 2-6. The number of design element steps will vary by design.

BEFORE running the final step, turn your hoop over and cover the BACK of the design with felt or vinyl and secure it with tape on the perimeter. For all POP Pencil Topper designs, place your vinyl or felt on the back of the hoop covering the design BEFORE running the final step.

*Helpful Tip: If you prefer to use vinyl for the back of your pencil topper, slide an extra piece of tear-away stabilizer under your hoop before running the final step. This will help prevent the vinyl from sticking to the bed of your machine.*
Run the final step to attach the felt or vinyl on the back of your design to the front.

Remove from the hoop, tear away the excess stabilizer, and trim around the perimeter of your pencil topper.
Slide a pencil in the opening at the bottom of the pencil topper and you’re done! Be sure to share your finished toppers in the POP Facebook group. Designs shown: Unicorn, Butterfly & Flamingo

