


FAQ Blog Series: How to make a Snowglobe Ornament
It’s Black Friday and Parker on the Porch has a brand new release! It gets better though…..it’s FREE! This snow globe ornament can be made with or without the “shaker” option of adding glitter or sequins. Follow the tutorial below to create an adorable new ornament for your own tree, or to give as a gift this holiday season!
Supplies Needed
- Your choice of felt or vinyl for the ornament
- Tear-Away/Cut-Away Stabilizer depending on material used (For felt- POP suggests using cutaway; for vinyl you may need two sheets of tear-away depending on the thickness of the vinyl you choose.)
If you’d like to turn up the fun to the next level and add glitter or sequins to your snow globe ornament under clear vinyl, you’ll also need the two additional supplies below!
- 12 or 16 gauge clear vinyl- Anything lower gauge/thinner could tear when doing the satin stitch step of this project.
- Sequins or glitter- In general, we found that thicker glitter and sequins are better for this type of project. Below are pictures of the supplies I bought for snow globe making from Hobby Lobby!


Let’s Make It!
-
Hoop tear-away or cut-away stabilizer depending on the thickness of the felt or vinyl you’re making your ornament with! (I used two sheets of tear-away with the vinyl I used in this tutorial because it is a little on the thinner side.)
- Run Step 1- This runs the placement lines for your vinyl or felt onto your stabilizer.
- Lay your vinyl over the placement lines and secure it to the hoop with tape. (I used a 6 inch square of vinyl for this tutorial.)
- Run Step 2- This will tack down the vinyl so it doesn’t shift while stitching the details of the snowglobe ornament.


- Run Steps 3- 11. These steps include all of the details for the globe portion of the ornament.
- Trim away any tiny threads at this time particularly if you’re adding glitter or sequins with the clear vinyl!
- If adding sequins/glitter/etc, place them in a small pile directly on top of the christmas tree! You don’t want the sequins to end up in the stitching line so this is the best way to keep them out of the way. (If you don’t want to add any sequins or glitter, just skip this step and proceed to step 9 of this tutorial.)


- Lay your piece of clear vinyl on top of the stitched out design and glitter/sequins. Secure with tape. If you look closely at the picture below you can see the clear vinyl taped down.
- Run Step 12. This will tack down your clear vinyl and secure any sequins or glitter you added between the ornament vinyl base and the clear vinyl layer. If you didn’t add any clear vinyl or glitter, it will just stitch out the globe portion of the design, so don’t worry!
- Carefully trim the clear vinyl around the globe tack down stitches that were ran in step 12 with sharp, curved scissors. You want to trim as close as you can without cutting any of the stitches.


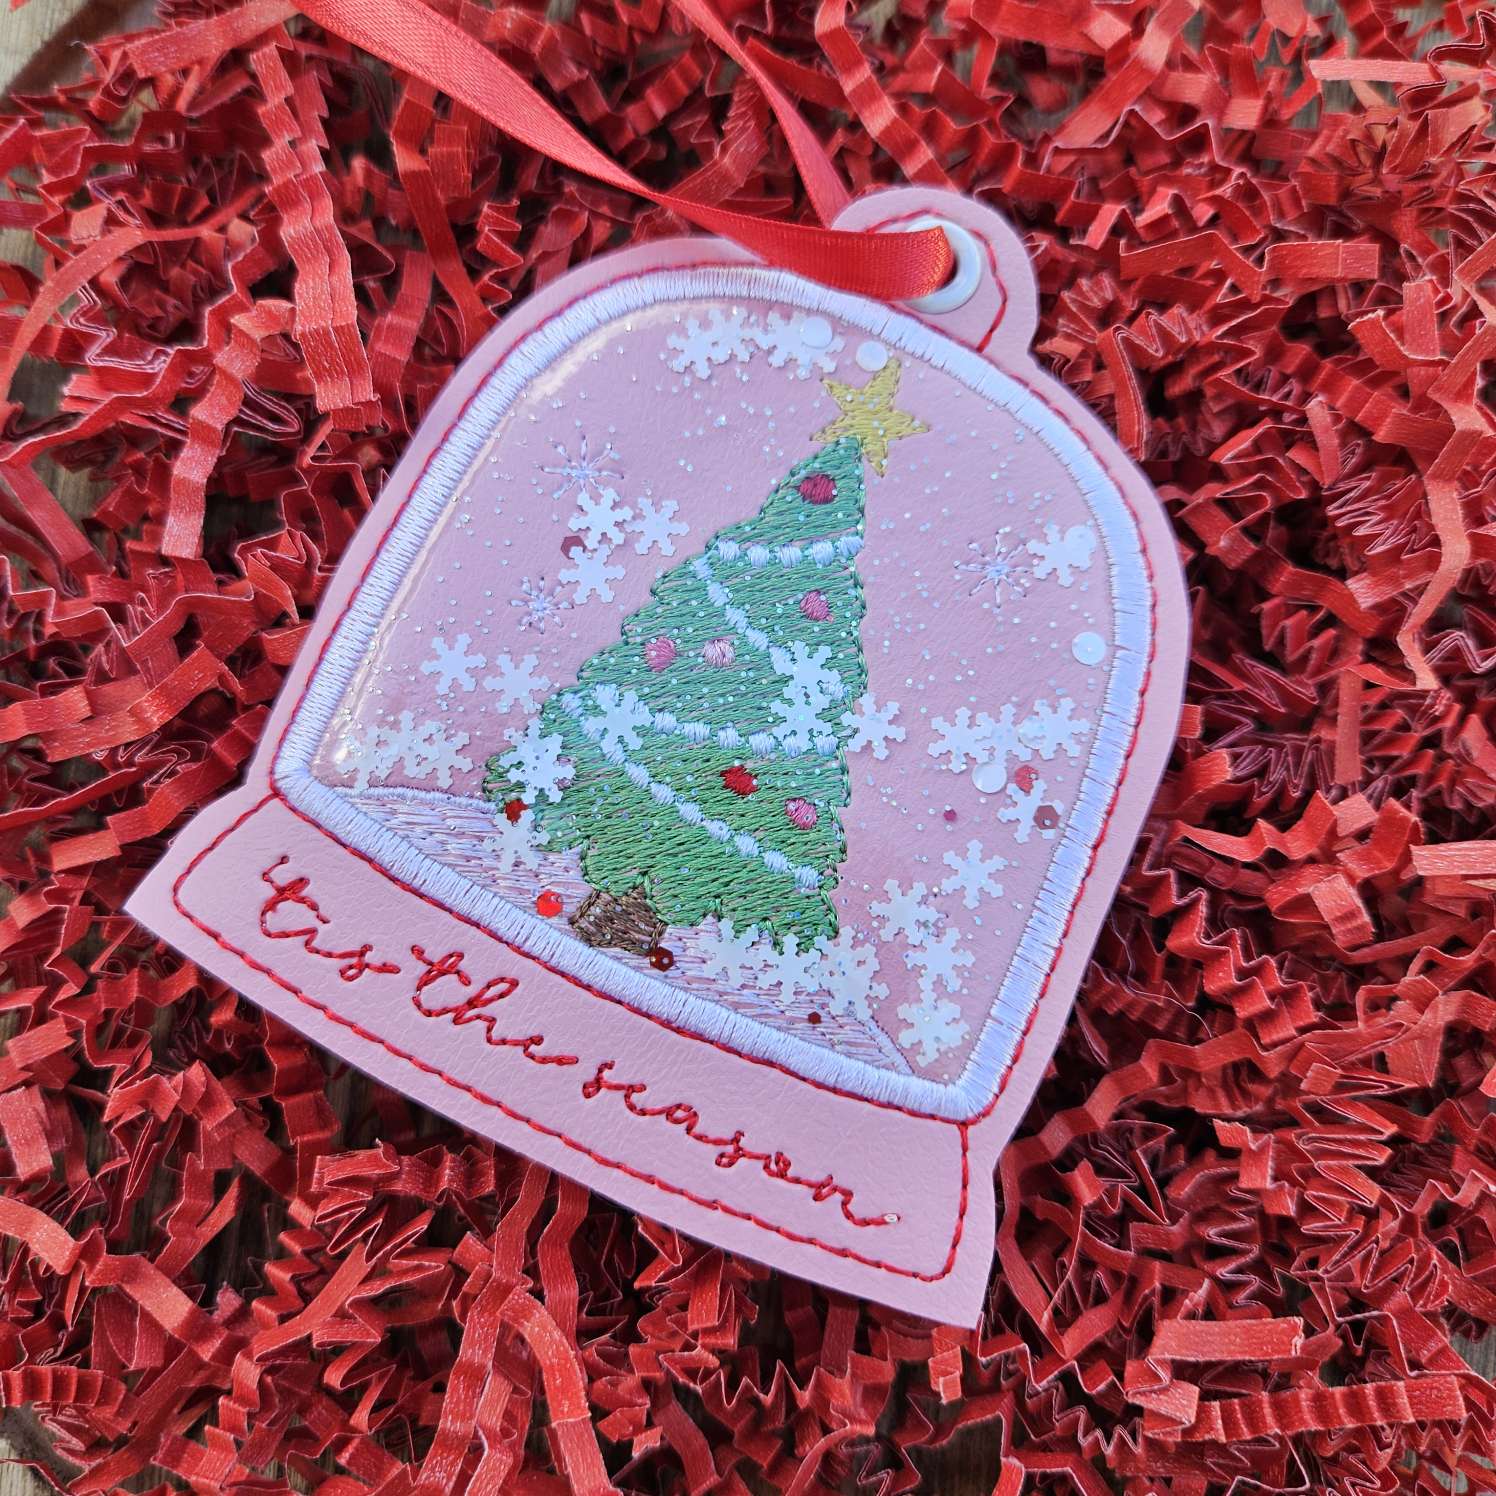
- Run Step 13- Satin stitches around the top of the globe, AND run step 14- Text on the base of the globe: “Tis the season”.
- AFTER running step 14, flip your hoop over so you’re looking at the BACK of your hoop. Cover the back side of the design with felt or vinyl. If using vinyl, slide an extra piece of tear-away stabilizer between the vinyl and the bed of your embroidery machine to keep the vinyl from sticking.
- Run Step 15- This will attach the vinyl or felt on the back of the hoop to the front.


- Remove design from the hoop, tear away any excess stabilizer, and trim around the perimeter of the snowglobe ornament.
- Finish up by punching a hole and setting an eyelet with a tool such as the “We R Memory Keepers Crop-A-Dile for Eyelets.
- Tie a piece of ribbon to the snowglobe and hang it on your tree! Step back and admire your creativity year after year. It would also make a great gift for a friend or family member! Be sure to share your snow globes with us over on our Facebook page!