

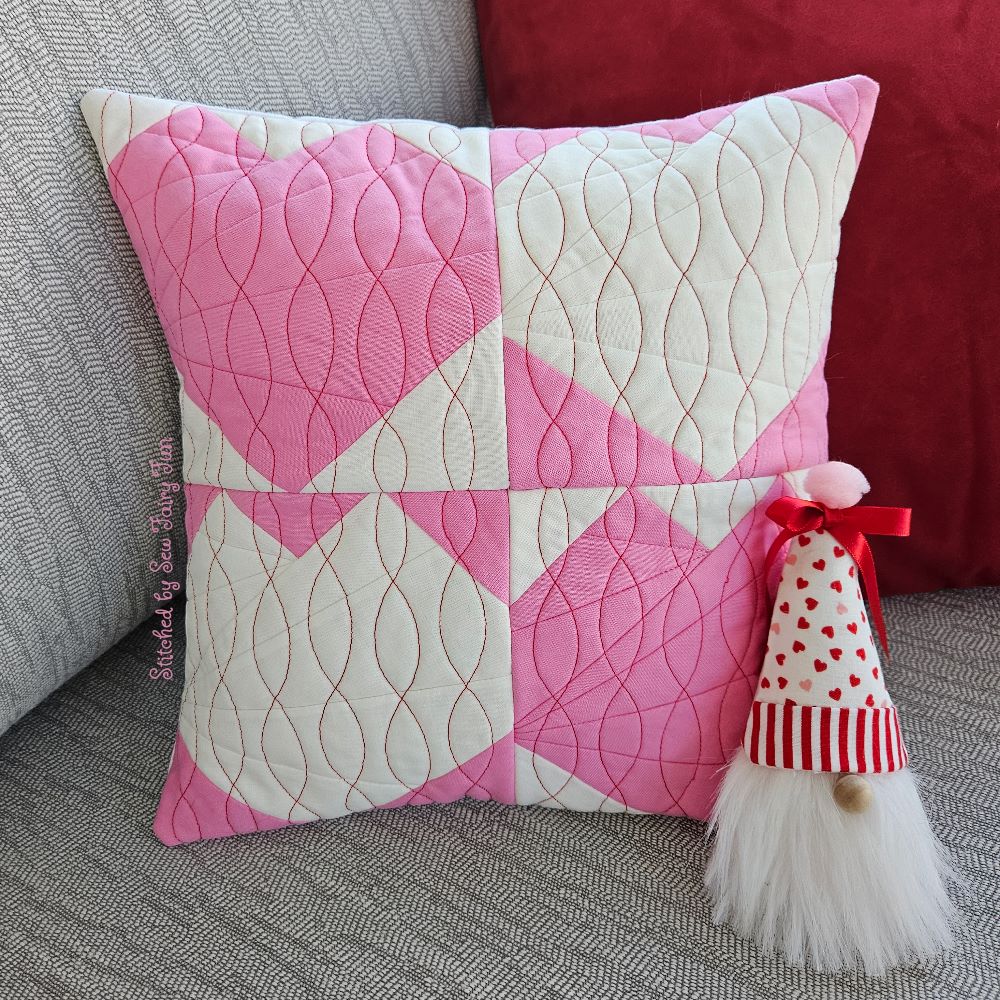
 The new Foundation Paper Piecing (FPP) Heart coasters and hot pads are eye-catching and SO adorable! If in addition to your embroidery machine you also have a sewing machine, you can make a pillow slipcover using the heart hot pad design. I love to have accent pillows for each holiday and just love how this quilted heart pillow looks in my sunroom! By changing up the colors, this design works year-round too which is always a bonus!
Supplies Needed
-
POP! FPP Heart Hot Pad Design (I used the 6x6 size design for this tutorial.)
-
Sewing machine
-
Your choice of cotton woven fabric
-
A pillow insert (For the 6x6 size hot pad design, I used a 12 inch pillow insert.)
-
For back of pillow, cut (2) 13.5 inch wide x 9 inch tall pieces of fabric
**Dimensions listed above are for if using the 6x6 size hot pads. The dimensions for the back pieces of fabric as well as pillow insert size will vary depending on the size of the FPP Heart Hot Pad size you make. Remember to adjust accordingly.**
Let’s Make It!
-
Run Steps 1-27 of the FPP Heart Hot Pad design using the full PDF tutorial as your guide. **Note: Step 27 is the final quilting of the design. Running this step is optional. It could be omitted when making the quilted heart pillow slipcover to make lining the 4 blocks up a little easier.**
-
Make 4 of the FPP quilted heart blocks on your embroidery machine steps 1-27 only. Be sure to leave at least ¼-½ inch of excess fabric around the perimeter of the block. (I’ve labeled these blocks A-D for this tutorial.)
-
Lay your two back pieces down in front of you. Pick up one of your (2) 13.5inch x 9 inch pieces of fabric for the back. On one 13.5 inch side, quarter fold the fabric down twice to encase the raw edge and clip. (See picture below)


- Repeat this process for the second 13.5x9 inch piece of fabric for the back.


- Sew about ⅛ inch away from the fold on your sewing machine. Repeat for the second back piece.

- Take two of your heart blocks (Blocks A and B in this tutorial) and very carefully line up the top, side, and bottom border lines together. Double check that both of your hearts are facing the correct direction!) Clip along the side.
- Take the two clipped together blocks over to your sewing machine and set your stitch length to the longest stitch it has. Baste the two blocks together by sewing just to the left of the straight border line that you can see through the polymesh from the placement stitches of the design. (Marked with a red dashed line in the picture below.)
*I basted first just to be sure everything lined up before sewing over that same line of stitches with a normal stitch length. It’s of course up to you if you’d rather baste first or just sew with a normal stitch length the first time.*


- Open the blocks to be sure that you are satisfied with how the quilt blocks lined up. If you like it, take the blocks back to your machine and set your stitch length back to 2.5 or 3 to securely sew the two blocks together. If not, rip out the basting stitches with a seam ripper and try again. When finished sewing blocks A and B together, it should look like the picture below.
- Repeat this process with the other two heart quilt blocks (Blocks C and D). When completed, you should now have two sets of sewn together blocks like in the picture below.


- Lay out your quilt blocks and very carefully line up the bottom horizontal placement lines of the first set (A and B) with the top horizontal placement lines of the second set (C and D). Take your time with this part as you also need to line up the quilting lines from step 27 if you ran them.
-
Carefully nest the seams in the middle and clip in place along the edge of the blocks.


- Take your clipped together blocks to your sewing machine and baste together by sewing just to the left (inside) of the straight line that you can see from the placement stitches of the design marked with the dashed red line in the picture below.
- Open and check to be sure all sides, seams, and quilting lines line up. If satisfied, set your machine back to a 2.5 or 3 stitch length and sew along that same line of stitches to secure the blocks together. You’ve officially finished the front piece of your heart pillow slipcover!


- Lay your pillow cover front piece down in front of you right side facing UP. Lay one of your back pieces down on top of the pillow cover front piece with the folded edge UP, facing you. Line up the top raw edges. (See picture)
- Pick up your second back piece and line up the raw bottom edges, with the top folded edgeup, facing you, on TOP of the first back piece you just laid down.


- Clip along the edges. (The back pieces may overlap the front piece a little bit. Feel free to trim it down a little if you’d like. I just prefer to have a little extra than not enough. :-)) The pictures below show what the front and back of your pillow slip cover should now look like clipped together.


- Sew just to the inside of the square placement line around the square perimeter of the pillow (see red dashed arrow lines in the picture below for a better visual.)


Carefully trim off any excess fabric making sure to still leave at least ¼ inch of fabric around the perimeter outside of the stitch line.
Trim away excess fabric near the four corners but don’t accidentally cut any stitches!
Turn your pillow cover right-side-out and slip in your pillow form!
That’s it! You did it! If you’re feeling extra fancy, you could also add a border around the four blocks before adding on the back piece, but you would need to adjust the size of the back pieces. This design could also easily be turned into a table runner by following several of the same steps. Get creative and have fun with it! Don’t forget to share your finished products with us in the Parker on the Porch Facebook group!