
Heat Transfer Vinyl (HTV) has so many more uses than making t-shirts! You can adhere HTV to felt quickly and easily to take your POP felt in-the-hoop designs to the next level. (I’m a really big fan of glitter HTV because if there’s any chance to add sparkle to a project, I’m there!) This blog will go over how easy it is to apply HTV to felt using last week’s new release, the vertical puff banner shamrock!
Supplies Needed
- POP! Vertical Puff Banner- Shamrock Design
- Heat Transfer Vinyl (HTV)
- Felt
- Iron
- Wool pressing mat or ironing board
- Spare piece of cotton fabric or pressing sheet
Let’s Make It!
-
Run the placement stitch for the vertical puff banner shamrock design.
-
Measure the size of the design placement stitch outline and add an inch and a half or so to the length and width to be sure that the felt will cover the design with about an inch overhang on all 4 sides.
I used the 2.5 inch shamrock and loaded two onto my 5x7 hoop using Embrilliance software. I could have fit 3 but I liked being able to line them up vertically in terms of ease and wasting the least amount of felt/htv as possible.)
-
Cut 2 pieces of felt to the dimension you measured in step 2.
I measured the distance around both shamrocks and then cut my felt to 4 inches wide x 7 inches tall to leave about an inch around the perimeter.


-
Cut one piece of HTV to the same size as the felt you just cut. (If you’d like the back of your design to also have the HTV on it, simply cut two pieces of HTV.)
- Remove the clear plastic film on the front of the HTV. I find it’s easiest to peel from a corner.


- Place one piece of felt down onto a wool pressing mat or ironing board and cover it with one piece of your cut HTV with the right side facing UP towards you. The matte/wrong side of the HTV should be facing down.
- This step is SUPER IMPORTANT! Cover the HTV with a pressing mat or piece of cotton fabric. (I just used a quilting cotton fat quarter I had nearby.) If you don’t use a pressing mat or fabric over the HTV, it will melt and make a mess of your iron.


- Turn your iron on high and press for about 3- 5 seconds (This may vary depending on the specific brand/type of HTV you’re using, but it definitely doesn’t take long at all!) I had to move my iron a few times to be sure the entire piece was ironed.
- Check to see if the HTV adhered properly to the felt by gently trying to peel up the HTV from the felt on a side or corner. If you can’t peel it off, you’re ready to use it for your vertical puff shamrock banner project! *Be sure to follow the full PDF tutorial for instructions on how to make the vertical banner pieces.*


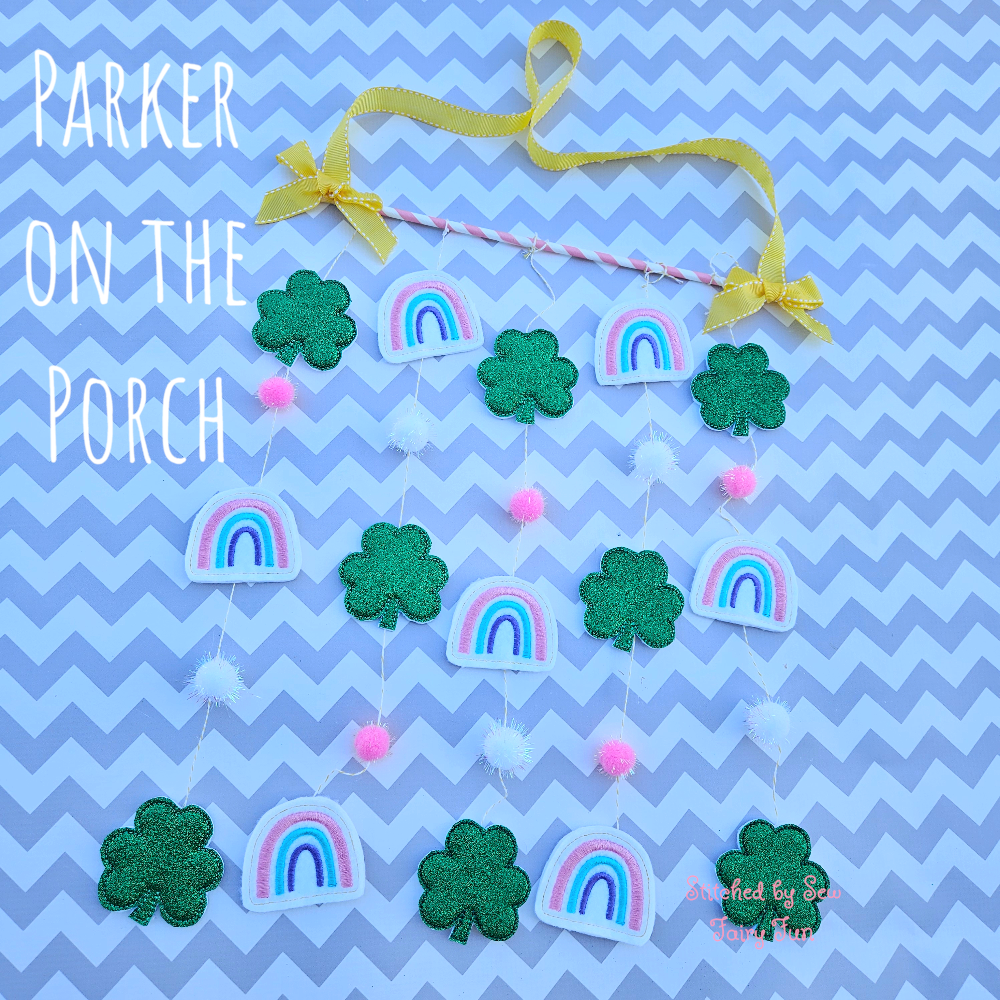
Believe it or not, I hadn’t tried ironing HTV to felt until writing this blog! I’m so glad I finally did, and I’m happy to be able to share how easy it is to do! Be sure to share your finished felt with HTV projects over at the Parker on the Porch Facebook group! We love to see how creative everyone is with POP Projects!
BONUS TIP- HOW TO TURN A FELTIE INTO A BANNER PIECE
You’ll notice in the picture of my finished project that I used the Rainbow Feltie design from last week as well! While it doesn’t have a hole in the back to slide the string or ribbon through like actual vertical puff banner pieces, you can easily turn it into a banner piece! Check out the pictures below to see how I did it.
- Run the rainbow feltie design following the PDF instructions included with the design.
- Turn the feltie over to the back and place your string or ribbon where you’d like it to be.


-
Place a small piece of felt over the string or ribbon to cover the hot glue. (If using a thick ribbon, you may need to add more hot glue on top of the ribbon before adding the small piece of felt.
One last note: if you’ve been wondering how to make your own pom pom garland, you can easily do it by threading a needle and feeding a small string through the pom pom! See picture below!